Metadata File
This document provides a description of the companion file feature.
Create a companion file per document
Data structure
The output file will be: Two columns, one containing all the data names and the one the value. The first row is as follow will contain the two same values: dataName and value.Example
CSV:
XML:
DTD for the XML:
Create one companion file for all documents processed at once
Cloud Storage: OneDrive for business
Cloud Storage: SharePoint
Send to Email
Data structure
The output file will be: The first column will be the filename. All the other columns will be on data. Each line will represent one document.Example
CSV:
XML:
DTD for the XML:
Details of settings:
| Category | Setting | Description | Options |
|---|---|---|---|
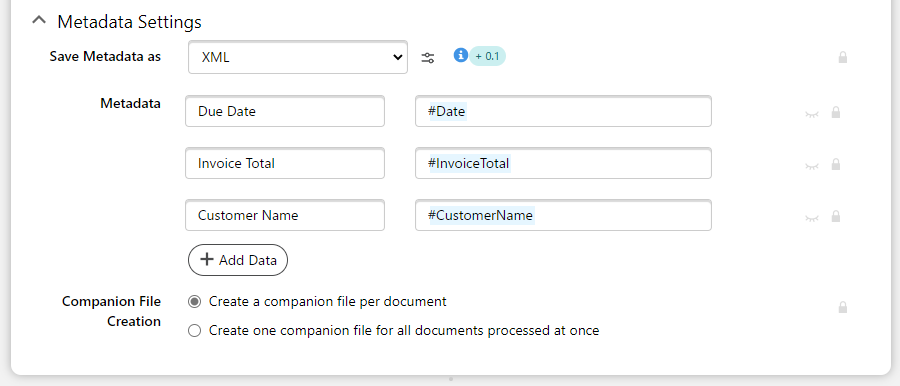
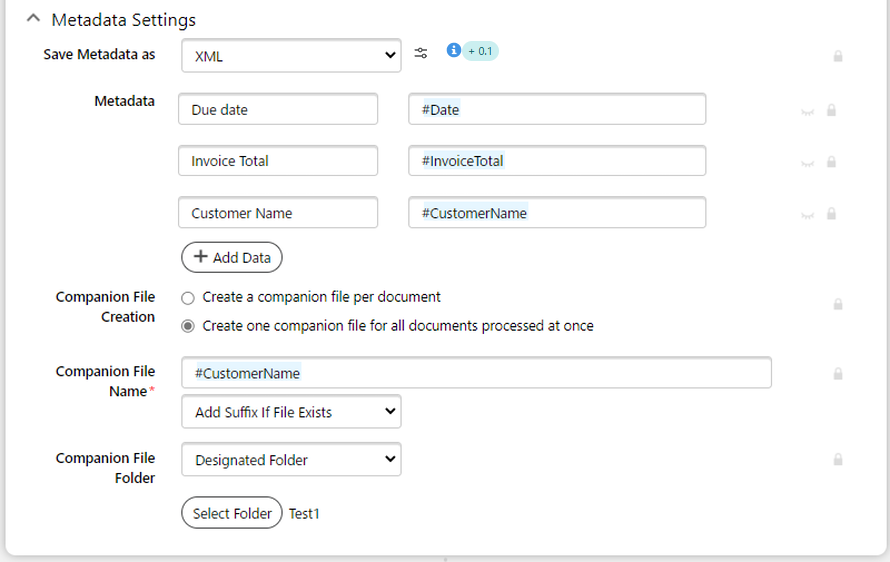
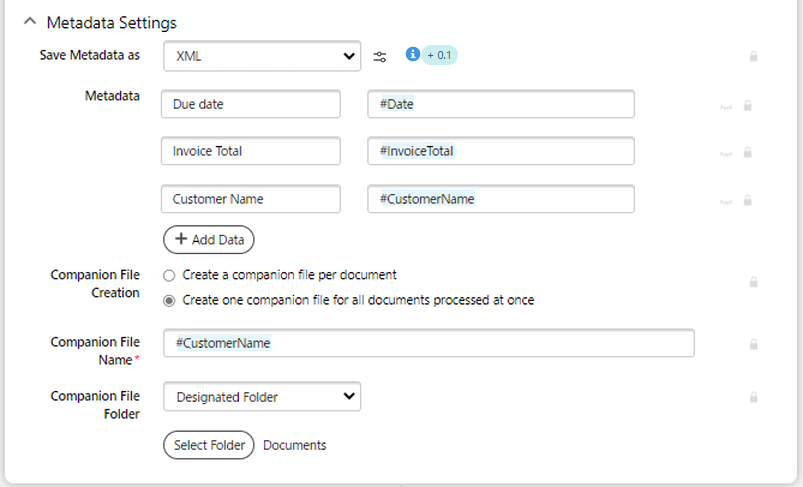
| Metadata Settings | Save Metadata as | Select the companion file format. | XML, CSV, and none
The structure of the XML created differs between having one companion file per document and one companion file for all documents. Ensure that the appropriate XSLT file is used for the transformation based on the XML companion file. |
| Metadata | Values to be stored in the companion file. |
Extracted data, as well as dynamic data like dates, can be used. If left empty no companion file will be created. |
|
| Companion File Creation |
To create one companion file per document or one for the entire batch. |
Create a companion file per document Create one companion file for all documents processed at once
If "Confirm Later" is selected, the application will always generate one companion file per document, even if the user opts to create a single companion file for multiple documents processed in a single job |
|
| Companion File Name |
Name of the companion file. Allows the choice between overwriting a file or adding a suffix if the file already exists. (OneDrive for Business Only) |
Only accept characters that are valid for OneDrive for Business filenames. Extracted data, as well as dynamic data like dates, can be used. |
|
| Companion File Folder | Specify the OneDrive for Business folder where the companion file are to be stored. (OneDrive for Business and SharePoint Only) | A folder selected from already existing OneDrive for Business folders. |
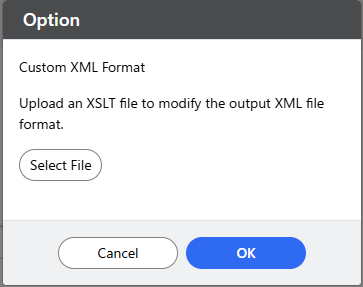
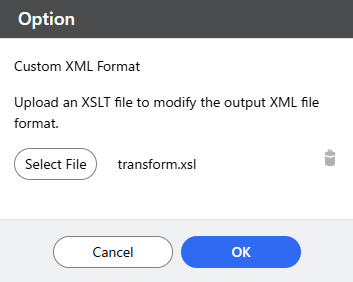
Customizing the XML Metadata File
To generate a custom XML format as output, upload an XSLT file that defines the required transformation. The uploaded XSLT must adhere to the RSI LogicFlow XML schema ensure compatibility. If the XSLT file is invalid, an "Invalid Input" error message will appear.
To apply a custom XSLT, the administrator should click the button next to the dropdown menu to upload the desired file. The XSLT file can be updated at any time by uploading a new file or removed by clicking the delete button.